Attend the BConnected Conference Twitter Party March 29, 2017, at 8 PM EDT! #BConnectedTO

 On the Leading Edge of Social Media!

The BConnected Conference will be held on Saturday, April 22nd and Sunday, April 23rd, 2017 at the Renaissance Toronto Downtown Hotel. The conference offers amazing components: interactive sessions, keynote speakers, one-on-one speed networking with sponsors, an exhibitor’s hall as well as Social Networking Events, and more surprises!

BCon_2016_Barnyard_Print061-Medium-1

They will have speakers who will be sharing their skills and experience with attendees to help obtain hands-on and useful information to enhance their social media and blogging skills. Attendees will also be able to increase their network by connecting with fellow influencers and entrepreneurs, after all, being connected is what the conference is all about!

BCon_2016_Barnyard_Print069-Medium

Join us on

Wednesday, March 29th, 2017

at 8 pm EDT

for the #BConnectedTO Twitter Party!

BCC Twitter Party Post Photo

BConnected Conference Twitter Party Details

When: Wednesday, March 29th, 2017

Time: 8 pm EDT

Hashtag: #BConnectedTO

Where: TwitterTwubs or Tweetdeck!

Follow your Host: @BConnectedConf and Moderators: @OttawaMommy Club and @CanBlogHouse

To learn how to participate in a Twitter Party, check out this page!

Prizes

Fabulous prizes from BConnected Conference sponsors will be drawn at the end of the Twitter Party! Prizes will be announced the week of the party.

Please RSVP by adding your Twitter handle to the linky below, so you will be eligible to win!

 More information on the BConnected Conference, visit the website!
Questions: Contact us at bconnectedconference@hotmail.com

Fine Print: 

In order to win a prize, you must be a legal resident of Canada who are at least 18 years or older in their province/territory of residence on the date of entry, follow your host, BConnected Conference, have filled out the linky entry form and participated in the Twitter Party following the hashtag #BConnectedTO. You must be a registered user on Twitter (a third party Web site) to participate. If you do not have a Twitter account, follow the onscreen instructions to register for a free Twitter account at www.twitter.com. Prizes will be drawn at the end of the Twitter Party using Twitter Twitter Chicken Dinner.

At this time, a random draw will be held from among all eligible entries received to select a Twitter Party participant eligible to win a Prize. The entrant eligible to win will be requested to fill out a winner form by April 2nd, 2017 with his/her your name, shipping address and phone number for prize delivery. The Winner will be contacted via email within 7 days of the conclusion of the Twitter Party Period.

Odds of winning depend upon the number of eligible participants registered and that participated during the Twitter Party Period. Winner must accept the prize as stated. Prize cannot be substituted, transferred or exchanged or surrendered for cash, except at the sole and absolute discretion of the Twitter Party Sponsors, who reserve the right, at their sole and absolute discretion and for any reason, to award a substitute prize of equal or greater value, including without limitation, a cash award. Unclaimed prizes will not be awarded. Allow up to 6 weeks to receive a prize. By entering this Twitter Party, you agree to the terms and conditions. No purchase is necessary to win and void where prohibited by law.

By participating, a participant who win a Prize consent to the use of their Twitter account name, first and last name, and likeness for advertising, promotion, and publicity purposes related to the Twitter Party without additional compensation, unless prohibited by law. By participating in the Twitter Party, participants release and agree to hold harmless the Twitter Party Hosts, Sponsors and their respective parent companies, affiliates or related companies, directors, employees, officers and agents, including without limitation, her advertising/promotion agencies from any and all liability, injury, loss, or damage of any kind, including but not limited to personal injury or death, arising from or in connection with participation in the Twitter Party, or the awarding, receipt, possession, use or misuse of any prize and/or with respect to participation in any prize-related activity. Entrants agree to abide by these Official Twitter Party Rules, and decisions of the Twitter Party Hosts and Sponsors, whose decisions are final in all matters relating to this Twitter Party. 

Enter your Twitter URL (eg. https://twitter.com/BConnectedConf) in the URL Field and your Twitter Handle (eg. @BConnectedConf) in the Name field.

Save

Click here to RSVP on the linky widget for the Twitter party!

We hope to see you there!

Save

Family Winter Memories 2017

Hey, Readers!

It has been a while since I have shared some of the memories my family experienced during the beautiful seasons we experience here in Canada’s capital. Now that winter is about to make way for spring in just a few days, I thought I would let your in on some of our favourite moments of winter.


Reese Speaks Snowball Love Photo 2

Christmas held many fun memories for our family, but there is more to winter than the holiday season. It is about getting out and enjoying what this frozen season brings.

My other half dragged my butt away from my laptop on many occasions to get out for a run. It snowed on most days we tied up our runners to hit the trails. Though the white fluffy stuff made this workout a bit challenging to pull off, we were thankful for our shades and (somewhat) cleared paths to trek along. The best part about the snow was that it made the scenery around us beautiful, allowing us to marvel at the views around us.


Reese Speaks Running Canal Collage Photo


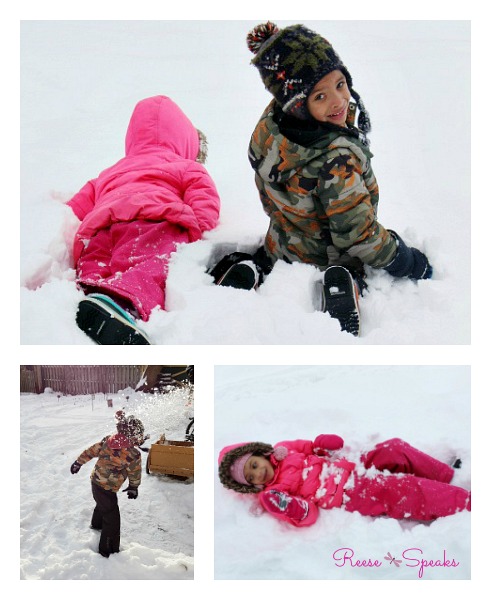
As the snow piled up in here in Ottawa, we were able to spend some fun times in our backyard oasis. The VPs had a ball marching around (because the snow was as high as my knee at times), flopping about and playing with snowballs together.


Reese Speaks Kids Winter Play Collage Photo


While the VPs were outside, I decided to have a bit of fun, too! I began embracing being in front of the lens more often. I used a handy tool to give me an assist to make some of these shots happen.


Reese Speaks Reese Snow Fun Collage Photo


The sun decided to smile on us many times this winter, giving us some unusually warm days. We got the VPs outside to hit the neighbourhood sledding hill. They loved racing down the hill on their sleds and could have stayed there all day long.


Reese Speaks Maya and Cous Sleeding Day Photo 2


There were also times we ventured away from our neighbourhood to take in winter in downtown Ottawa. I took the VP of Cuteness ice skating for the first time at City Hall and she did not want to get off of them.


Reese Speaks Maya Mom Skate Photo 2


We also took in Winterlude and some of the other sites while we were strolling around the area. I was even able to snap a shot of my eldest on our way home. The snow covering objects and buildings gave the city a sense of beauty that only happens at this time of the year.


Reese Speaks Winter Out on the Town Collage Photo

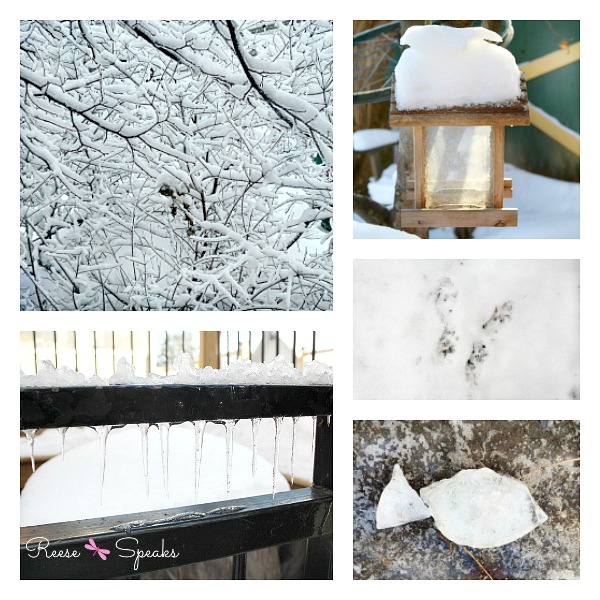
I tried to capture a bit of the gorgeousness of the season. With the temperatures rising and plunging so often this winter, nature decided to show off what it could do leaving some amazing scenes to snap shots of. I have to admit, the frozen fish shot still makes me laugh whenever I see it.


Reese Speaks Winter Nature Collage Photo

This winter was full of fun and surprises. The thermometer dipped and soared, and with the VPs being a bit older, they got to experience winter more on their own. Though throwing, sledding, and skating make for fun times, we are all on pins and needles waiting for the ice and snow to recede, allowing for the first buds of spring to appear. I can’t wait to be able to show you what my family gets into when this season (finally) appears! Thanks for the fun times and the sweet memories, winter!

Dish with me: What is your favourite part of winter?

Until my next post, Readers!

Reese.

Stay on Track with The Healthy Grail Health + Fitness Planner! #TheHealthyGrail

Stay on Track with The Healthy Grail Health + Fitness Planner!

Hey, Readers!

Working out and eating better have been two of the goals I set for myself to make myself into a better me last year. This is how I felt on the following days:

Day 1: Revved and ready for a challenging workout and super-duper careful about snacking on healthier foods.

Reese Speaks The Healthy Grail Yogurt and Water Photo 3

Yogurt cup with dried cranberries and glass of water

Day 16: Reluctantly got through a workout and devouring a chunk of leftover chocolate cake by the end of the night.

Reese Speaks Chocolate Cake Photo 2

Spoon full of chocolate cake

Can you relate? Do you ever have trouble staying on track when you are trying to get fit and eat healthier? Yes, there are days I let loose a bit and indulge, but then I have trouble figuring out how many calories I have consumed, or the types of workouts I have done over the past few days. I have been looking for a way to sort out all of these issues when I found out about to The Healthy Grail: Health + Fitness Planner! It launched on March 6, 2017, and I was excited to check it out!

The Healthy Grail Logo

The Healthy Grail logo; courtesy of https://thebewitchinkitchen.com/the-healthy-grail

Randa Derkson, the creative mind behind The Bewitchin’ Kitchen, created this health and fitness planner because she was having the same issues, too. She found it difficult to keep track of her health goals because she was putting too much stock on her weight.

Randa Derkson Pic 2

Randa Derkson, Creator of The Bewitchin’ Kitchen and The Healthy Grail. Photo courtesy of https://www.thebewitchinkitchen.com.

With The Healthy Grail, Randa wants users to focus more on attaining health goals than by worrying about the numbers on the scale. This planner has other functions as well. It also helps users with the following:

  • Write out their grocery lists
  • Plan out their meals
  • List goals to achieve
  • Follow your habits with a habit tracker.
Reese Speaks The Healthy Grail Feature Photo 3

The Healthy Grail planner with a cup of granola, workout items, and a water bottle.

Here are some of the features I believe make The Healthy Grail a fabulous tool to use for health and fitness planning.

“About Me” Page

This is a great page because it is as though you are introducing yourself to, well, you! It lets users see where you are at the beginning of your goals. Measurements of various parts of the body and sections about positive self-image and goals being achieved are there for users to get a picture of who you are, while not focusing on the nit-picky aspects of yourself. It lets users feel that they are only improving on the person on the page before them.

“Goal Planner” Page

Users are able to make their goals more attainable by establishing what they want to accomplish. There are boxes to list goal and to detail the steps you will take to achieve them. This page keeps you accountable for your actions. Having these steps written out also allows them to be real and not a wish in your head.

“Daily Food Log” Page

Each day, users can plan out their meals, keep track of their caloric intake and see the other proteins, carbs, fats and other nutrients are being consumed.  I love this page because meals can be thought of ahead of time so the guess work is taken away from you. You are also able to see what you are putting into your body and to switch things up to make planning meals more fun! Randa also suggests laminating this page, as well as a few of the “Weekly Health Log” pages. This makes it easier for users to wipe and reuse these pages.

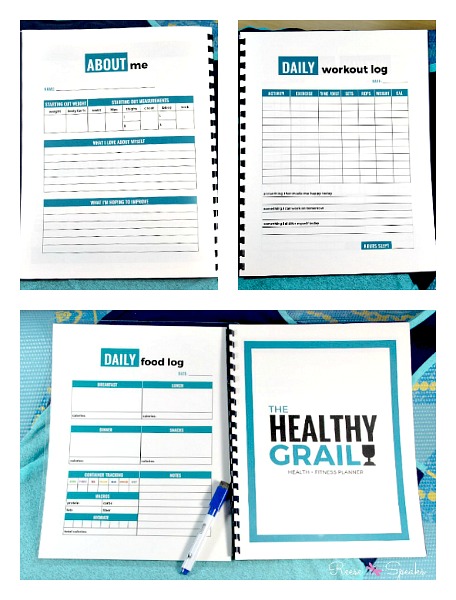
Reese Speaks The Healthy Grail Pages Collage Photo

Pages in The Healthy Grail – Top Left: “About Me”, Top Right: “Daily Workout Log”; Bottom: “Daily Food Log.”

The Healthy Grail is designed for all types of lifestyles. I can use this planner to continue my health and fitness goals. I would also have my eldest use this planner for herself as she plays basketball for a club team and she needs to weight train and eat in order to become stronger and perform better on the court.

I am a huge fan of The Healthy Grail!  Getting started with this planner makes me feel as though I am embarking on a journey where I am in control of the destination. I also love that users have the option of using it digitally or printing and binding it to have a hard copy at hand. This planner also focuses on becoming a better you by seeing your achievements and keeping you accountable for keeping up with your goals.

So what are you waiting for? Check out The Healthy Grail for yourself and start achieving your health and fitness goals today!

The Healthy Grail Button

Want to learn more about Randa Derkson? You can find her at The Bewitchin’ Kitchen as well as at her Facebook, Twitter, Instagram and Pinterest pages!

Dish with me: How would The Healthy Grail come in handy to help you achieve your health and fitness goals?

Disclaimer: I received a free copy of The Healthy Grail in order to write this post. The views I shared are my own.

Until my next post, Readers!

Reese.

An Awesome Assistant at Hand with JOBY GorillaPods!

As a blogger, one area of this industry I felt I really needed to up my photography game. It was one of the goals I set for myself last year, and I think I have started to see the difference in my photos. I love putting together sets for my blog posts, but there are times I find it difficult to hit the shutter at certain angles or to take pics of myself by myself. This is why I decided to invest a “photography assistant” by buying a tripod. Since I need to take a variety of shots, my other half steered me in the direction of buying a JOBY GorillaPod!

reese-speaks-joby-tripod-feature-photo-2

Out of the wide range of GorillaPod models JOBY has available, I chose their SLR-Zoom. It is specially made for the DSLR camera I use to take many of the photos I shoot for blog posts.

Below are the features and the specs of this GorillaPod:

  • Height – 6 x 6 x 31.8 cm.
  • Flexible legs that are able to wrap around objects while being able to hold camera equipment up to 6.6 lbs (3 kg) on almost any surface.
  • Over 24 leg joints with rubberized ring and foot grips make it easy to bend and rotate it 360° to improve stability in difficult terrain.
  • Being created out of durable Japanese medical-grade ABS plastic and German TPE, it allows for secure joints to stay firm and to grip on objects for years of use.
  • Its lightweight and portable design make it easy to pack and take on-the-go!

I have to say that I LOVE my GorillaPod! Before I had this tripod, I would have to wait for my other half or my eldest to be at home and available to take certain shots. Now, I am able to set up the shot I want and get to work!

I have put this tripod in so many different positions when a third hand was needed. It was such a relief to not have to worry about my camera crashing onto the floor if I had it mounted and positioned in a certain way.

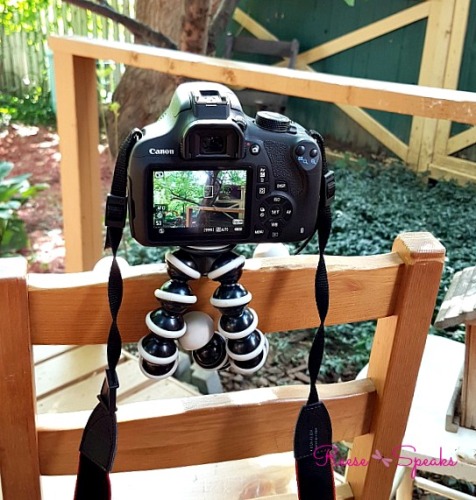
reese-speaks-joby-tripod-camera-mounted-chair-photo-2

reese-speaks-joby-tripod-camera-mounted-stetched-out-2-photo

reese-speaks-joby-tripod-camera-mounted-sideways-photo-2

I have used my tripod for almost a year, and the leg joints are still as stiff as they were on the day I bought them. If I had to switch the position of my GorillaPod for a better shot, it was easy to change how I wanted the legs positioned and it stayed in place once it was in the right spot. My GorillaPod has also been bashed and dropped a few times, yet it is still intact.

reese-speaks-joby-tripod-mounted-shot-collage-photo-2

When my shoot was over, it only took a few minutes to straighten the legs on my tripod and tuck it away for the day or to put in my equipment bag to take with me. It does not take up a lot of space in my bag, and I do not feel its weight when I tote it around.

I was really impressed with the ease the JOBY GorillaPod SLR-Zoom. It is lightweight, durable and stays in place where I need it. This tripod is also able to hold up my camera in various positions without tipping. Setting up photo shoots is more of a joy to do now that I have this tripod as my assistant at hand!

Until my next post, Readers,

Reese.

Note: This is not a sponsored review post. I love sharing fabulous products with you, and this is one of them!

Fun & Festive DIY Bunting

Hey, Readers!

The big day is almost upon us. In my home, we are getting down to the last-minute items on our Christmas To-Do List, and we cannot wait to celebrate with family this year. Once the decorations were put up around our home, I felt that there was something missing from the space in front of the window in our dining room. After scratching my head for a few minutes, I came up with an idea to create a fun and festive bunting project to fill in this space.

reese-speaks-festive-bunting-complete-photo-4

These are the materials you will need in order to pull this project off:

  • Cardstock in festive holiday colours (8.5 cm x 11 cm)
  • Jute
  • Cotton blanket
  • Blank/Computer paper
  • Tacky glue
  • Scissors
  • Tape measure
  • Ruler
  • Pencil
  • Eraser
  • Box cutter (optional)
  • Glue gun (optional)
  • Marker (optional)

Why use cardstock? Here are two reasons why I stock up on this type of paper for crafts:

  • Construction paper is not as firm as cardstock. It tears easier, and buckles when wet or nicked a bit.
  • The colours pop more with cardstock than with construction paper.

Below are the instructions to use to create your own festive holiday banner.

1. Write out the word or phrase you want to use for your banner. This way, you can figure out how the different colours of cardstock you will need and the letter size you want.

2. Measure the space you would like to hang your banner with the measuring tape to make sure it will fit in the space and to finalize the letter size you want.

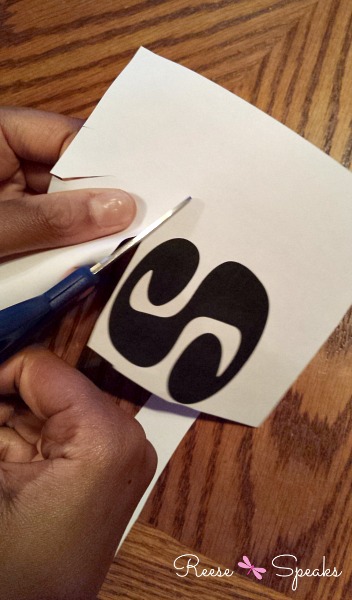
3. Figure out how big you would like your letters. I fiddled around with the fonts in the writing document application on my computer since I am not the greatest at creating them on my own freehand. I used the “Ravie” font at the 214 size for the letters I wanted. Print out the letters and cut them out. If you are running low on ink, use the same colour of marker to fill in the white spots. Note – If you have the talent to freehand the letters, write them out in the size you desire on the blank paper with pencil and them colour them in with a marker.

reese-speaks-festive-bunting-letters-photo

4.After finding out how big I wanted my letters to be, put a letter up against the cardstock to see how much of it I would need as the background for the letters and to fold over the jute. I found out I needed two sheets of red cardstock and two sheets of green cardstock since the letters took up a little less than one-quarter of cardstock.

5. Cut the letters out of the piece of paper they were printed/designed on.

reese-speaks-festive-bunting-letters-cut-photo

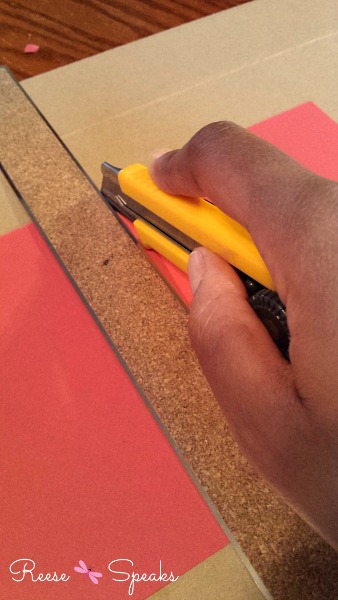
6. Cut the pieces of cardstock to the size you need. For a straighter line, I used a box cutter, a ruler and a hard surface I did not mind getting nicks and scratching on to get a cleaner line for the background colours.

reese-speaks-festive-bunting-cardstock-cutt-photo

7. Score the amount of cardstock you would like to use for the flap to attach to the jute with the box cutter so it will fold over easier. Make sure you score the backside of the cardstock so it looks rounded and will bend easier. You also use a draw a line with a pencil and ruler on this paper and gently fold it over to do this step.

8. Line up the letters with the corresponding colours of cardstock they will be attached to in order to avoid gluing a letter onto the wrong piece of cardstock.

9. Minding the clearance given to the section that will fold over the jute, glue the letters in the center of the cardstock.

reese-speaks-festive-bunting-letters-glue-photo

10. Once the glue is dry, stretch out a line of jute and align the letters along its length. This will help you figure out the spacing out the letters correctly and if more than one line of jute is needed. I allowed for 3 inches of space between each letter. I also left a generous amount of space at the ends so it can hang down. I think it looks nicer than if it was pinned at the end of the jute.

11. Measure the cotton blanket to cover all of the back flap and two inches above each of the letters on the cardstock.

12. Cut out the cotton blanket pieces and use tacky glue to attach them to the cardstock for a snowy and festive look.

reese-speaks-festive-bunting-cotton-blanket-glue-photo

13. Find the center of the jute and place it in the middle of your work surface. I used a piece of twine to mark this spot just in case the jute shifted.

reese-speaks-festive-bunting-attach-first-letter-photo

14. Line up the word or phrase in the correct order.

15. Find the middle letter of the word or phrase on the cardstock to be attached to the jute and center it along the jute. Flip it upside-down.

16. Remove the twine on the jute and use your heated glue gun to attach the cardstock to the jute. Tacky glue can also be used if little ones are assisting in this craft. Press along the flap where the glue was used so it will stick together. Continue to add the cardstock to the jute working from the inside of the word or phrase to the first/last letter with the desired spacing. Allow to dry.

reese-speaks-festive-bunting-glue-jute-photo

17. Affix the banner to the surface you measured out at the beginning of this project, leaving some jute dangling off the ends. I used push pins and stuck them into the frame of the window to keep them from falling down. You can also use suction cup hooks or other non-hole forming aids to keep your work on the wall or banister.

reese-speaks-festive-bunting-complete-photo-1

There you have it! This is how I created this fun and festive banner to help bring some holiday spirit to our home. There are so many ways you can put your own spin to this project. For New Year’s Eve, I would use shiny cardstock or trace the letter attached to the cardstock with glitter glue. You can add holiday pictures or symbols onto cardstock along the cardstock, or mix them in with the letters. This banner idea can also be used for birthdays or other occasions.

If you are in a pinch to add some more holiday flair to your home, this Fun & Festive DIY Banner project is easy and fun to create. It is more fun when the family is involved. I hope you enjoy putting together this project as much as I do!

What is your favourite holiday or festive DIY project to put together?

Until my next post, Readers,

Reese.

Favourite Family Christmas Traditions

Hey, Readers!

The patchwork of colour of fall leaves has made way for a brilliant blanket of snow. This is one of the signs that the Christmas season is in its way in my neck of the woods. It has always been one of my favourite times of the year, and it is made that much more magical with the addition of The Bosses. My Other Half and I scramble to make each Christmas special for our family with some of the traditions we incorporated from our childhood. They make the holiday season more festive and fun for all of us. Here are just a few of things we do at this time of year that gets us into the Christmas spirit.

Letters to Santa

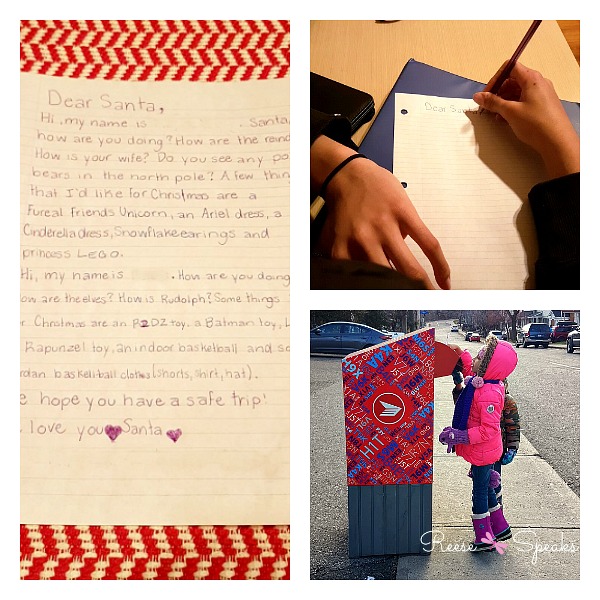
reese-speaks-letter-collage-photo
This activity serves three purposes for us parental units:

  1. It adds to the magic of Santa Claus for The Bosses
  2. We get a better idea of what to give them for their “fun” gifts; and
  3. Allows for more sibling bonding to happen.

Since The Bosses are still too young to write a complete letter to the Man in Red, my eldest helps them compile their lists and writes the letter on their behalf. We love hearing about some of the things our kids wants to receive for Christmas each year. My eldest has been in on “The Santa Secret” for a few years now, so we just ask her for a list of things she would like to see under the tree with her name on it. They also love placing the letter in the mailbox and receiving a letter back from Santa thanking them for their letter. My kids have a great time writing this annual letter and learning a bit more about one another.

Advent Calendars

reese-speaks-advent-collage-photo

The Bosses LOVE the sweet surprises they find behind every door of their advent calendars! Each of my kids has their own calendar to open to discover the chocolaty Christmas shape waiting for them up until December 24th. They also love comparing their chocolates to one another and showing them to us before they pop them into their mouths. It also helps them count down the days until Santa makes his big ride.

Watching Holiday Specials

reese-speaks-tv-watch-collage-photo

This tradition is one I look forward to every year more than anyone else in my family. Once Thanksgiving is over, I wait on pins and needles for televisions stations to show their holiday specials to watch over and over again. I have been this way since my childhood, and my sister and I still call each other if a favourite one will be showing soon. I have shared this love with my kids, and they have their own favourites to watch, and it is a great opportunity to unplug for a while and plan a family movie night out of these television specials or holiday movies. My Other Half and I will even watch holiday films for bigger kids once the kids go to bed to unwind after a long day of Christmas prep.

Holiday Treats

reese-speaks-holiday-treats-photo

Whether it is sweet or savoury, our family loves to munch on holiday treats! We tend to wait to bake the cupcakes, brownies, and tarts until the week of Christmas, but there is always some form of holiday-themed snack to indulge in at this time of the year in our cupboards. When we do get down to baking for the holidays, everyone wants to roll up their sleeves to help. On Christmas Eve, we end up with a pile of snacks and treats we’re continually nibbling on past Boxing Day. These treats also add to our holiday special watching on Christmas Eve, making this night even more special.

Tree Trimming

The holiday season does not feel right in our home with having our tree up and decorated. The whole process is highly anticipated. Once it has been completed, lets the rest of the season fall into place for us. We have had both artificial and real trees in our home, but we prefer to get a real one in our home. The smell of a pine tree alone puts us in the Christmas spirit.

reese-speaks-tree-collage-photo-2

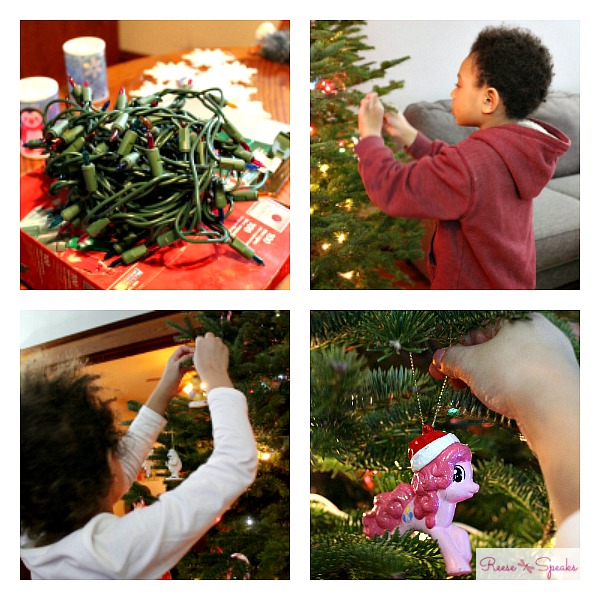
Once the star and the lights have been placed around the tree, we all set to work putting golden horns, holiday characters and sparkly white snowflakes on our tree’s branches. The Bosses take great pride in helping with this tradition, only asking for help when they are unsure where to place an ornament.

reese-speaks-tree-collage-photo-1

When this task is complete, the seat of choice in our living room is on the couch right beside the tree. We were able to bask in its awesomeness and its scent all evening long.

reese-speaks-tree-decorations-complete-photo-2

Christmas is easily a fun time around our home. We are always looking for fun new ways to enjoy this time of the year together to become closer as a family. These family Christmas traditions are only a few that we enjoy, but are hands-down favourites for us to do each year. I hope that when our kids get older that they have fond memories of the activities we did together to get ready for Christmas and help us come up with new ones as they get older.

Dish with me: What are some of your some of your favourite family holiday traditions?

Until my next post, Readers,

Reese.

Family Favourite French Fries

Though we have been trying to introduce healthier meals to our family, there are times that we enjoy a Junk Food Night for dinner. We enjoy these nights in moderation, and they are always fun to eat.  When we do tuck into these meals, there is usually one side dish my other half and I make that is heavily anticipated over anything else: Homemade French Fries.


reese-speaks-french-fries-finish-1-photo


Since my other half first tried his hand at them, we all have become HUGE fans! Curious to see how easy these tasty treasures are to cook? Take a look below to find out!

Ingredients:

  • 4 large Russet potatoes (other potatoes will work as well, but Russets are the best)
  • 3/4 cup vegetable oil
  • 1 tbsp salt (extra salt may be used for seasoning after cooking)

Directions:

  1. Wash and chop potatoes to desired thickness. We like our about an inch thick. Fill a bowl ¾ of the way full of water, add salt to the water and stir to make a salt-water mixture.

reese-speaks-french-fries-chopped-potatoes-photo

2. Add potatoes to the bowl so they can soak in the salt water.

3. Pour oil into a frying pan and heat to medium-high temperature.

4. Once the oil is heated, add half of the chopped potatoes gently into the pan making sure they are all laying on the bottom of the pan.

reese-speaks-french-fries-turn-photo

5. Flip fries over when they start to turn a golden brown to cook on the other side.

6. Once cooked on both sides, drain excess oil using a sieve or strainer.

7. Extra salt or other preferred seasoning may be used to flavour fries.

reese-speaks-french-fries-salt-photo

Repeat these steps with the remainder of the chopped potatoes until all  of them have been cooked.

reese-speaks-french-fries-finish-2-photo

I dressed up my fries by placing them inside of a parchment-lined super-sized mug. These golden-brown gems are the perfect side to go along with homemade burgers, pulled pork, or batter-fried cod. Whenever my other half or I cook these fries, we are always sad when they are all gone! They are so easy to cook and are so delicious to eat. These French Fries are truly a family favourite! Try them out for yourself and enjoy!

Until my next post, Readers!

Reese.

Feeling at Home at the Courtyard by Marriott Mississauga-Airport Corporate Centre West!

Hey, Readers!

It had been a while since I had been home to see my family in Toronto. Since my aunt who I have not seen in about a decade was visiting “Grandma” (it’s actually my mom but she does not answer to this since she no longer has kids) for a few weeks, we decided to go home for a weekend to see her and my other family members! Instead of staying with one of my relatives, we decided to stay in a hotel. After doing a bit of research of hotels close to Grandma’s home, we decided to book a room at the Marriott Mississauga-Airport Corporate Centre West.

reese-speaks-courtyard-marriott-mississauga-bathroom-feature-photo-1

The Courtyard by Marriott Mississauga-Airport Corporate Centre West boasts the following amenities for its guests:

  • Free high-speed Internet
  • Fitness Centre
  • Pool
  • Airport Shuttle

They also have four different rooms available to book:

  • 2 Queen-sized beds guest room
  • 1 King-sized bed guest room with a sofa bed
  • 1 King-sized guest room with a Whirlpool bathtub
  • 1 King-sized suite with a sofa bed.

We felt that the 2 Queen-sized beds guest room would work best for our family since it had two beds that were the same size we could all sleep on and enjoy.

After our long drive, we were so happy to reach our room. My little ones made short work of making themselves right at home in our room. They made sure that their entourage was comfortable and that our clothing was put away in their proper places. There was plenty of room for our clothes and my collection of shoes.

reese-speaks-courtyard-marriott-mississauga-home-collage-photo

The next things the kids and I had to try out were our beds and I am a HUGE fan of a tall bed. Each bed was firm and comfy. I had so much fun climbing into our beds every time I wanted to sleep or wanted to sit back and relax. As you can see, my kids found our beds adequate for our stay.

reese-speaks-courtyard-marriott-mississauga-bed-collage-photo

This was one of the nicer bathrooms I have had in a hotel room in a long time. I loved that there was a privacy wall between the vanity and the toilet. There is literally enough room for three people to be in the bathroom at the same time (if this was necessary) without bumping into each other. The counter had so much space. It was able to hold all of our toiletries along with those that are complementary to the room.

reese-speaks-courtyard-marriott-mississauga-bathroom-collage-photo

After a good night’s sleep, our tummies were grumbling. Since we had a few hours before meeting up with family, we decided to grab a bite at the hotel’s eatery, The Bistro – Eat.Drink.Connect™. I loved the set-up of their seating area. There were tables for those who wanted to get a bit of work done while they ate as well as three banquettes for families or small groups of people to share their meal. Each of the banquettes housed a television set so you could catch up on the goings-on of the day while you ate.

reese-speaks-courtyard-marriott-mississauga-the-bistro-food-collage-photo

Since we are used to a hearty sit-down breakfast on weekend mornings, we each ordered a scrambled egg breakfast. It came with strips of bacon, home fries, toast, and a cup of fruit (juice was separate). We were not disappointed with our morning meal. It was warm, yummy and ever so filling. This meal got us fueled well for our big day of fun.

reese-speaks-courtyard-marriott-mississauga-the-bistro-food-collage-photo

While our food was cooking, I had time to check out the hotel’s business centre. This area of the hotel was for guests to work if more space is needed to meet and work. Boarding passes could be printed off, desks and chairs are available for guests to set up shop to work. It is a comfortable and spacious work area.

reese-speaks-courtyard-marriott-mississauga-business-centre-collage-photo

On the other side of the wall from the business centre was the hotel’s lounge area where guests are able to meet and greet friends. It is set up like a stylish living room with a roomy den side-by-side. There was so much room in this area that several groups could be there without feeling as though they would disturb each other. The two-sided fireplace was one of my favourite features of this room. It was warm and inviting. I wish it had a roaring fire in it when I visited, but the weather was too warm for it to be on.

reese-speaks-courtyard-marriott-mississauga-lounge-area-collage-photo

Our weekend was such a whirlwind affair that we did not have the chance to check out the fitness centre or the pool area. We were sad to check out of the Courtyard by Marriott Mississauga-Airport Corporate Centre West at the end of our mini family vacation. We enjoyed our breakfast at The Bistro – Eat.Drink.Connect™, the business and lounge areas are great for meeting and working, and our room really made us feel at home. The next time we visit our family in Toronto, we will be sure to book another room here!

For more information about the Courtyard by Marriott Mississauga-Airport Corporate Centre West, you can visit them on their website!

Until my next post, Readers!

Reese.

Disclaimer: I was not compensated in any way by the Courtyard by Marriott Mississauga-Airport Corporate Centre West to write this post. I’m just sharing my great experience with you!

Save

Cozy Roasted Chicken Thighs

Hey, Readers!

Yep. It’s fall again! The weather is cooler, and the ground is beginning to be sprinkled with multicolored leaves around our neck of the woods.


reese-speaks-fall-red-maple-leaf-stand-out-photo


One of my reasons why I love fall is for the change in seasonal dishes this season brings. Fall erupts with more of the comfort foods I enjoy eating. You know, those meals that make you feel good all the way down to your toes and that allow you to savour every minute of it until your plate is cleared.

My Other Half loves to be in our kitchen, whipping up his fabulous food creations for our family to sit, eat and enjoy. One dish I get excited about him making is his Cozy Roasted Chicken Thigh meal. It is colourful, flavourful and perfect for the cooler days of the year. It is a meal I always go back for seconds (and sometimes thirds) of when it is made, and can also serve as an intimate meal for two when scaled down.


reese-speaks-cozy-roasted-chicken-thighs-feature-photo-5


Ingredients

  • 6 bone-in chicken thighs with skin (can also be done with boneless, but it is juicier with the bone)
  • 4 sausages links cut in half
  • 3 large Russet potatoes
  • 1 large sweet potato
  • 1 onion, loosely chopped
  • 4 cloves of garlic, loosely chopped
  • 1 tomato, chopped
  • 2 tbsp of oil
  • 2 tbsp of rosemary and thyme
  • 2 tbsp of grated Parmesan cheese
  • Salt and pepper

Directions

  1. Preheat oven to 350°F
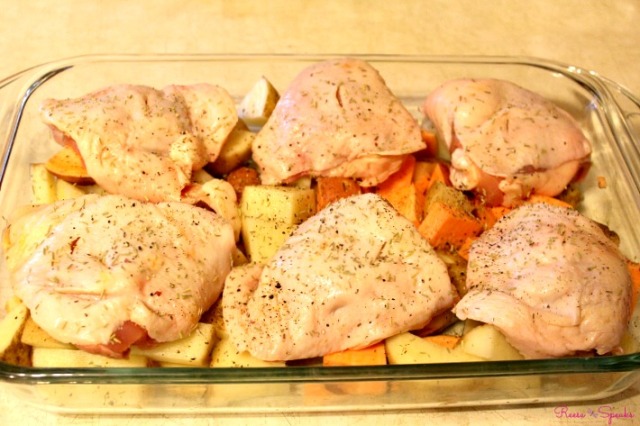
  2. Drizzle a tbsp of oil on the bottom of the caserole dish. Layer the potatoes and the sweet potatoes and half of the onions and garlic on the bottom of a 9 x 13 inch casserole dish and sprinkle with rosemary, thyme salt and pepper.


reese-speaks-cozy-roast-chicken-seasoned-veggies-photo-2


  1. Place chicken thighs on top of the potato layer, seasoning with both herbs, salt, and pepper.
  2. Add halved sausage links around chicken pieces
  3. Sprinkle the remainder of the onions and garlic around the top of the meat, season with more herbs and seasoning.


reese-speaks-cozy-roast-chicken-meat-seasoned-photo-2

  1. Cover casserole dish with foil and place in oven for 55 minutes.
  2. Drizzle oil into a frying pan and set to medium-high heat. Place chopped tomatoes into the frying pan and season with the remainder of the herbs, salt, and pepper for 5 minutes or until tomatoes are soft.


reese-speaks-cozy-chicken-chopped-tomato-fried-photo-2


  1. Place cooked tomatoes onto a cookie sheet and roast in the oven with the casserole dish for 45 mins or until the tomatoes are crispy.
  2. After 55 minutes have passed, uncover chicken and add tomatoes to the top of the meat.
  3. Turn the oven up to 375°F and place back into the oven for 20 minutes to allow for the chicken skin to crisp.
  4. Take casserole dish out of the oven. Spoon out the vegetables and meat onto each plate.


reese-speaks-cozy-roast-chicken-complete-photo-2


  1. Sprinkle Parmesan cheese over each chicken thigh when plating.

That’s it! This is how my other half creates one of my absolute favourite dishes. This Cozy Roasted Chicken dish can also be made with the whole leg and is so delicious. It only takes a casserole dish and a frying pan to cook this dish and is a welcome meal during the fall and winter months. It has become a tradition to enjoy this meal on Christmas Eve to get ready for the Man in Red that evening. I can’t wait to devour this dish again!


reese-speaks-cozy-roasted-chicken-plated-photo-4


I hope that you enjoy My Other Half’s Cozy Roasted Chicken dish with your family this fall and winter! I’m sure they will love it, too!

Until my next post, Readers!

Reese.

Step into Fall in Style with Shumaker!

Fall is here! With school back in session and full day work weeks the norm for a few months, wardrobes are beginning start to reflect the change in season. We all want to look our best, whether we are at the office, on campus or are running errands around town, and this is especially the case for our footwear. Not sure where to look to update your shoe wardrobe? Shumaker has a wide selection of shoes, boots, heels and sandals (for those that want to soak up those last rays of warm sunshine) for customers to choose from. They will be expanding this fall, opening eight locations over the next eight months!


With three generations of craftsmen and cobblers behind them, Shumaker is a footwear boutique for women and men that provides high-quality and contemporary shoes in their original collections. Shumaker believes in family values, unparalleled customer service, and a unique shopping experience. At Shumaker, they want customers to pay a fair price for their exclusive brands that no one else can match in order for their customers to feel free to try new looks and have fun with experimenting with their personal styles.


shumaker-in-store-photo

Photo Credit: shumaker.ca


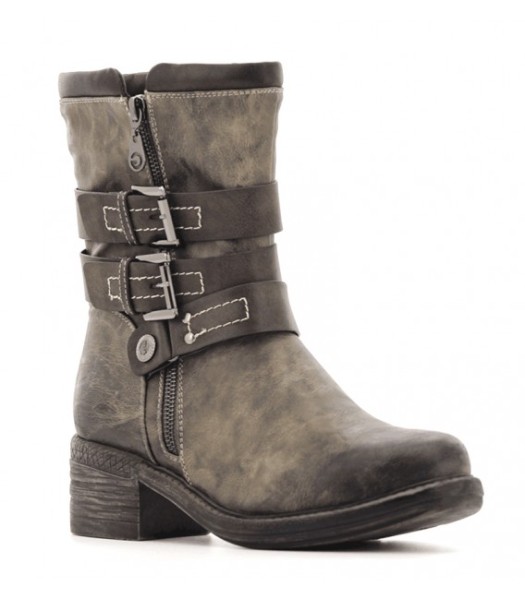
The Fall/Winter Collection of foot apparel are now available for you to peruse, try on and buy at Shumaker! There is such a large selection of shoes, booties, and boots to choose from that will compliment any wardrobe! Here are a few of my favourite picks for their collection:

Caprise in Tan


Rahee in Black


Mared in Khaki


Tapsi in Bordo

Like what you see? Below are the eight locations in Ontario you can visit to add to your fall wardrobe from Shumaker:

  • Place d’Orleans Orleans
  • Carlingwood Shopping Centre Ottawa
  • Lansdowne Place Peterborough
  • Erin Mills Mississauga
  • Georgian Mall Barrie
  • CF Lime Ridge Hamilton
  • CF Markville Markham
  • Quinte Mall Belleville

No matter what your style you like to rock, you will find a pair (or two) of quality footwear to buy and step into fall looking fabulous a with footwear from Shumaker!
For more details about Shumaker, you can connect with them on their Facebook, Twitter (@ShumakerShoes), and Instagram pages!

Disclaimer: I was generously compensated by Shumaker to share these details with you! All images were used with permission from Shumaker.